Server Groups
This guide will take you through everything related to the management of Server Groups in Keystash. Server Groups are logical groups of servers to allow for quick and easy bulk management of User privileges and SSH service policy.
Typically you would group your servers by function, so for example you may have two groups: "Production Web Servers" and "Development Web Servers". In this example, users in the development department would have access to the "Development Web Servers" group as well as your IT administrators. However you development department may not have access to your "Production Web Servers" group whereas your IT administrators would.
The key thing to note is that all servers in a Server Group share the same settings with regards to users, privileges, groups and SSH policy.
Add Group
To create a new group to add servers to:
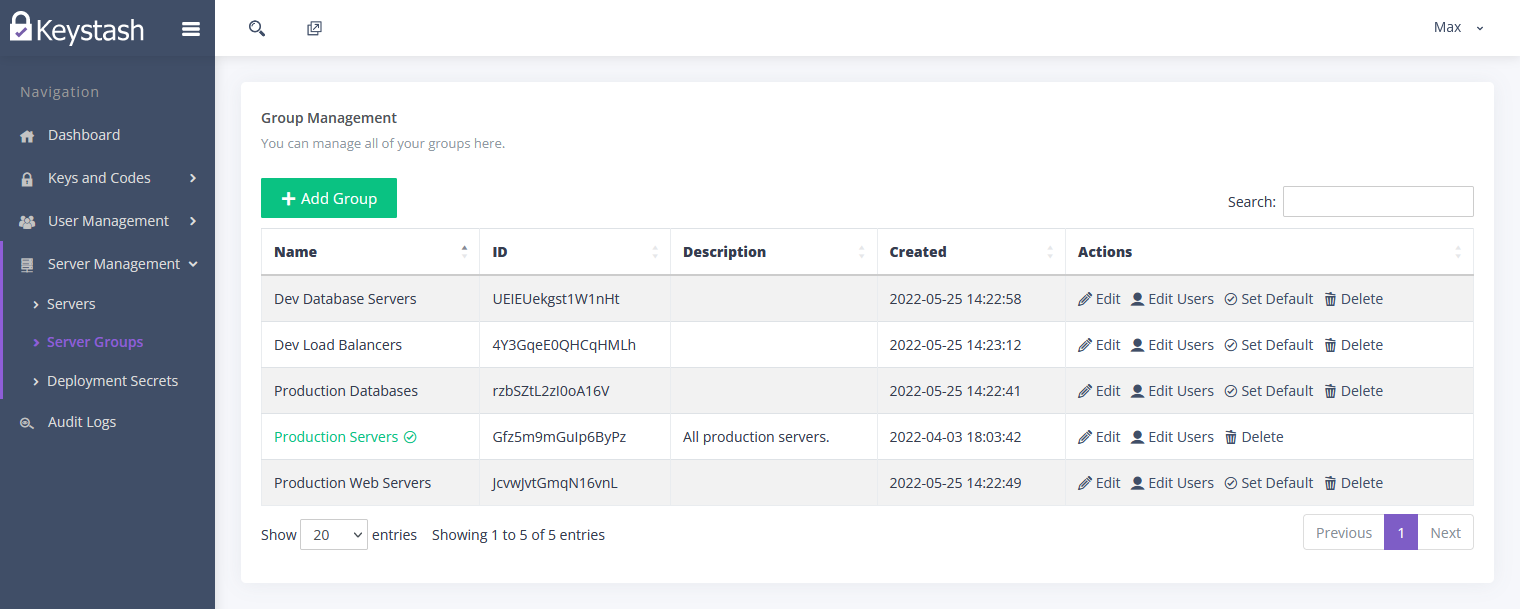
- Click "Server Management" on the menu and then "Server Groups"
-
Click the "Add Group" button at the top of the table
-
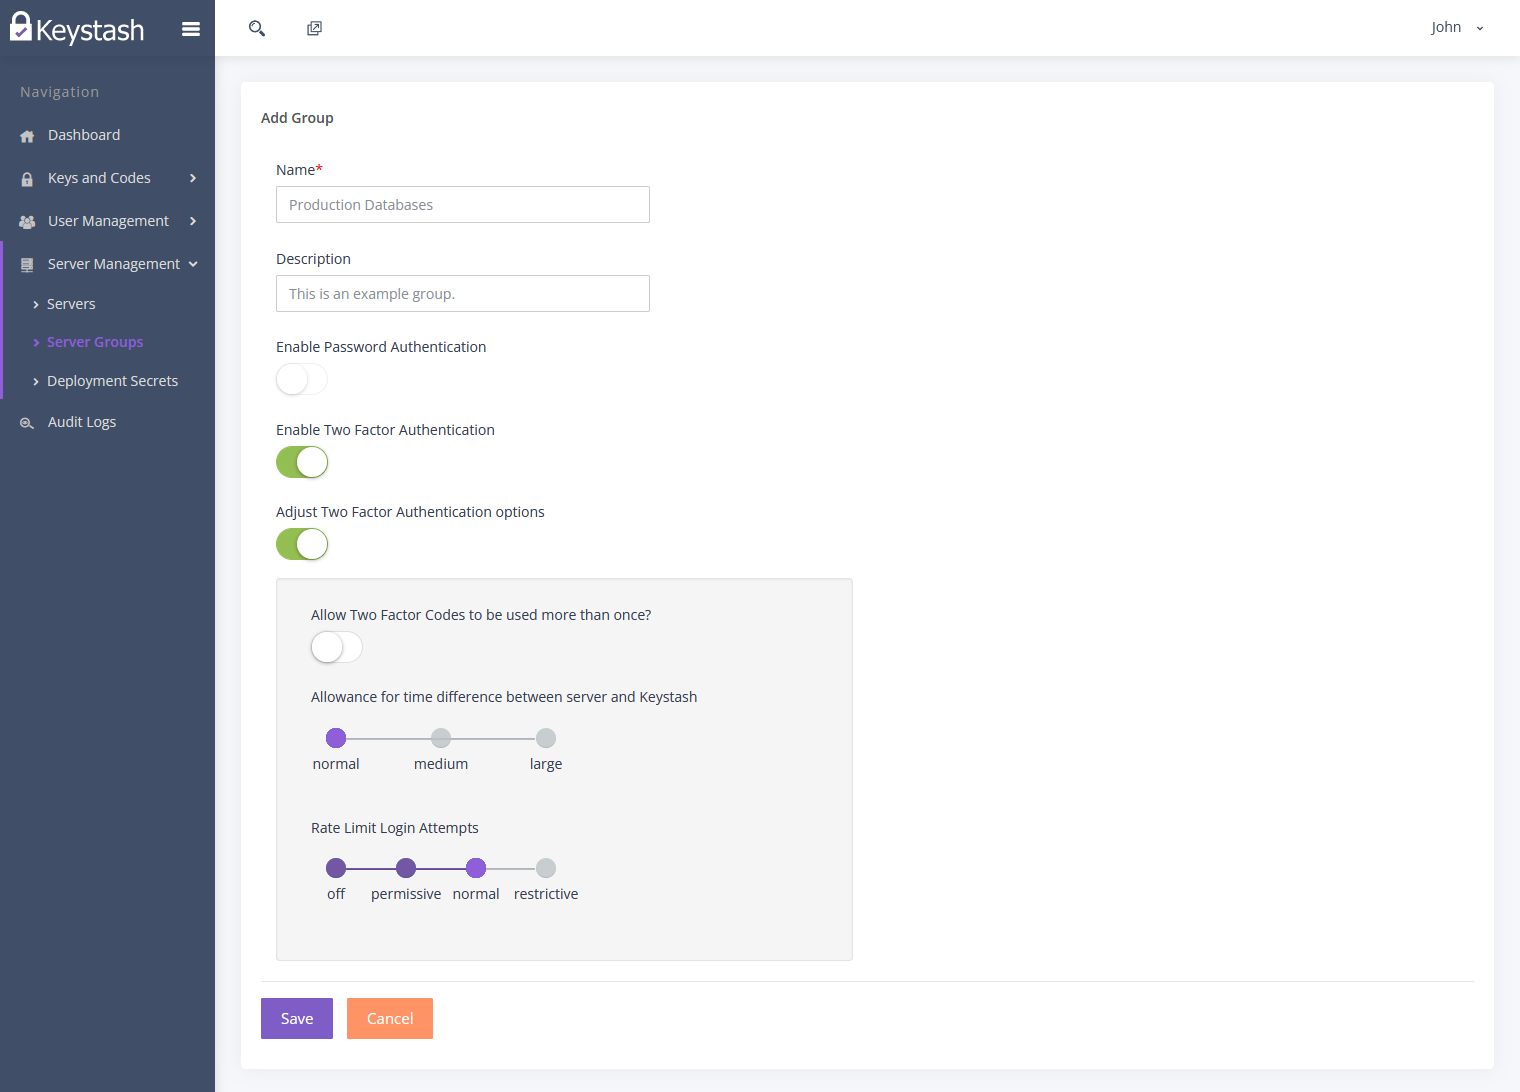
Provide a name to describe the server group
- Provide a relevant description of the server group
-
You can enable or disable SSH Two Factor Authentication by sliding the toggle of "Enable Two Factor Authentication"
Warning
When you enable SSH Two Factor Authentication you will automatically disable Password Authentication. SSH Two Factor Authentication will only work with an SSH Key and Two Factor Authentication 6 digit pin. This means that the only way to be able to login via password authentication would be via the servers console. Consult your hosting provider on how to access the server console.
-
Slide the toggle named "Adjust Two Factor Authentication options" to configure advanced SSH server policy.
- Allow Two Factor Codes to be used more than once? - This option determines if you are able to use a Two Factor 6 Digit pin more than once in a 30 second window. For example: If you open to SSH connections to the same server in short succession you would be prompted for a SSH Two Factor Authentication 6 digit pin. If you entered in the pin on the first SSH session you would have to wait for a new 6 digit pin to generate before you could login on the second connection. Allowing this option allows you to use the same 6 digit pin two or more times in quick succession. We suggest leaving this as disabled for increased security.
- Allowance for time difference between server and Keystash - As Keystash uses the TOTP algorithm it is important to ensure that all servers using SSH Two Factor Authentication have a reliable NTP source. This is so that all your users mobile phones and all the servers have the correct date and time. Large differences (over 2 minutes) can cause issues during SSH Two Factor Authentication. To help combat these issues you can allow for medium (75 seconds) and large (130 seconds) differences between the servers clocks and the mobile phones clocks. Normal is considered the most secure but is the most strict.
- Rate Limit Login Attempts - This option limits SSH login attempts to the following:
- off - No rate limiting
- permissive - 10 logins every 30 seconds per user account
- normal - 3 logins every 30 seconds per user account
- restrictive - 1 login every 30 seconds per user account
- Click "Save" to save your new server group.
Edit Group
To update an existing server group:
- Click "Server Management" on the menu and then "Server Groups"
-
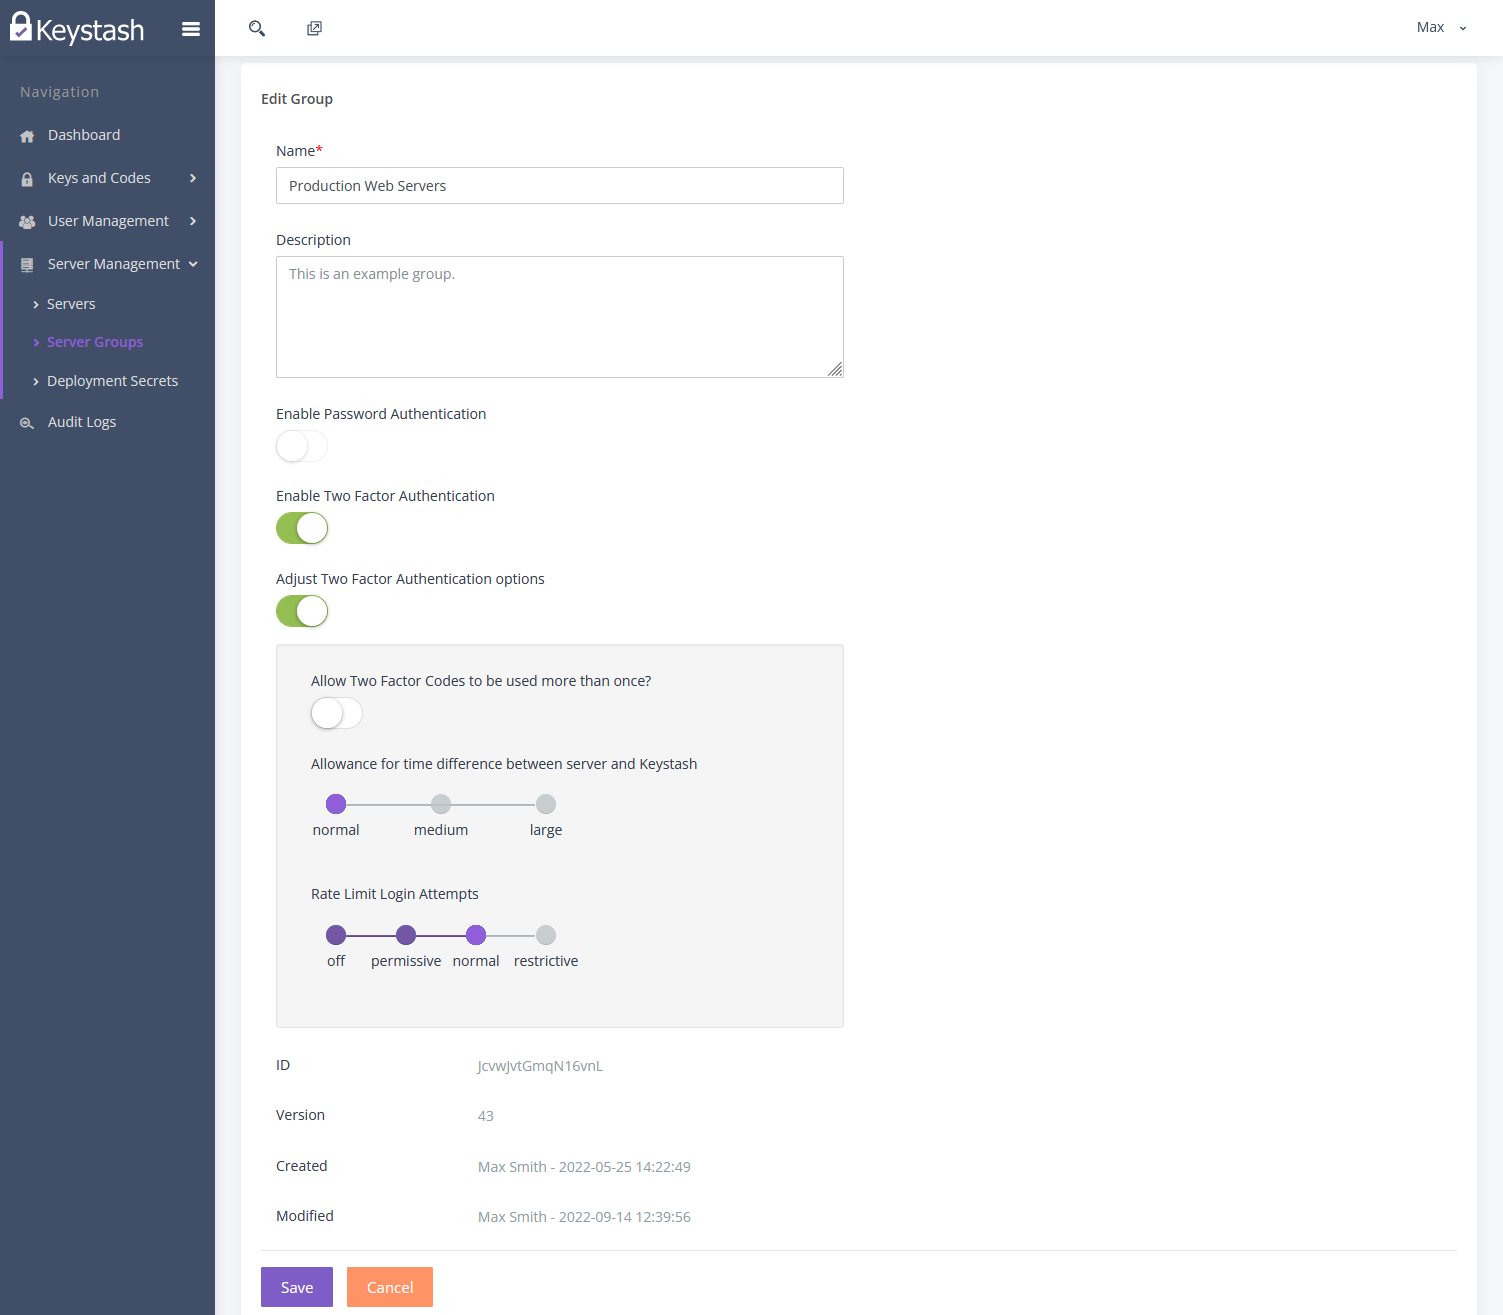
Click "Edit" in the actions column of the server group you would like to modify.
-
You can edit the name of the server group
- You can edit the description of the server group
-
You can enable or disable SSH Two Factor Authentication by sliding the toggle of "Enable Two Factor Authentication"
Warning
When you enable SSH Two Factor Authentication you will automatically disable Password Authentication. SSH Two Factor Authentication will only work with an SSH Key and Two Factor Authentication 6 digit pin. This means that the only way to be able to login via password authentication would be via the servers console. Consult your hosting provider on how to access the server console.
-
Slide the toggle named "Adjust Two Factor Authentication options" to configure advanced SSH server policy.
- Allow Two Factor Codes to be used more than once? - This option determines if you are able to use a Two Factor 6 Digit pin more than once in a 30 second window. For example: If you open to SSH connections to the same server in short succession you would be prompted for a SSH Two Factor Authentication 6 digit pin. If you entered in the pin on the first SSH session you would have to wait for a new 6 digit pin to generate before you could login on the second connection. Allowing this option allows you to use the same 6 digit pin two or more times in quick succession. We suggest leaving this as disabled for increased security.
- Allowance for time difference between server and Keystash - As Keystash uses the TOTP algorithm it is important to ensure that all servers using SSH Two Factor Authentication have a reliable NTP source. This is so that all your users mobile phones and all the servers have the correct date and time. Large differences (over 2 minutes) can cause issues during SSH Two Factor Authentication. To help combat these issues you can allow for medium (75 seconds) and large (130 seconds) differences between the servers clocks and the mobile phones clocks. Normal is considered the most secure but is the most strict.
- Rate Limit Login Attempts - This option limits SSH login attempts to the following:
- off - No rate limiting
- permissive - 10 logins every 30 seconds per user account
- normal - 3 logins every 30 seconds per user account
- restrictive - 1 login every 30 seconds per user account
-
Click "Save" to save your changes.
Note
Any changes to SSH server settings will be applied to all servers within the Server Group.
Edit Users
For users to gain access to a server they need to be granted permissions on the Server Group. Those permissions will then apply to all the servers in the Server Group. Users can be given SUDO Root or normal user permissions and you can also assign users to additional Linux groups.
- Click "Server Management" on the menu and then "Server Groups"
-
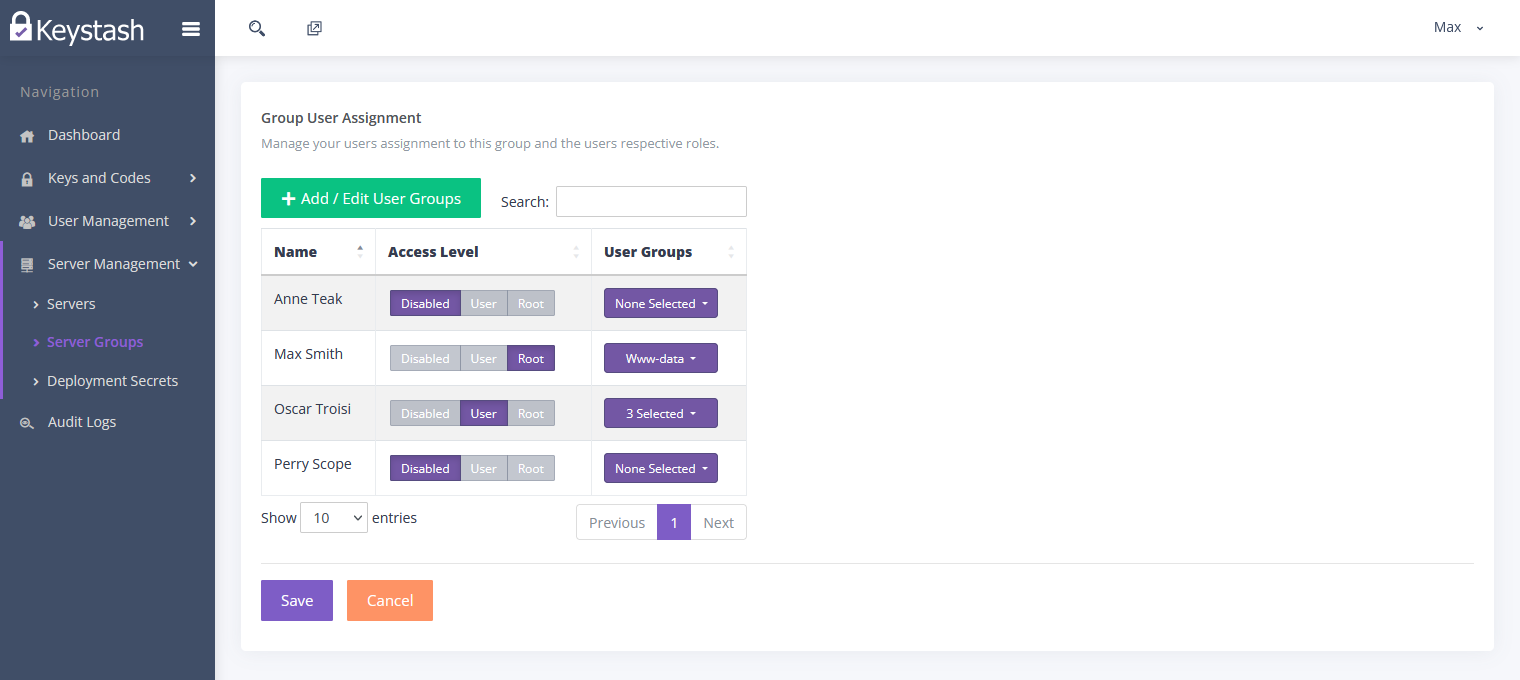
Click "Edit Users" in the actions column of the server group you would like to modify.
-
Each user is shown on its own row in the table. You grant access to the user by adjusting the Access Level column:
- Disabled - The user will not be able to login to any servers
- User - The user will be given normal user privileges on the server
- Root - The user will be added to the SUDOers file and given SUDO root access
-
Each user can also be assigned to additional Linux Groups. Simply select the groups from the drop down list in the User Groups column
Note
Users will always be added to their default user group which will be the same as the users username. Assigning a user to any additional User Groups does not remove them from their default user group, it simply adds the additional groups to the users account.
Note
To add or edit the available User Groups see Add & Edit User Groups below.
-
Click "Save" to save all of your changes. The changes will be synchronised to all the servers within this Server Group.
Note
If you changed any users from User or Root to Disabled and they had an active SSH session at the time, they will be immediately disconnected when the new changes are synchronised.
Add & Edit User Groups
Keystash has common Linux User Groups out of the box, however you can add and edit the groups to suite your needs. Users will always be added to their default user group which will be the same as the users username. Assigning a user to any additional User Groups does not remove them from their default user group, it simply adds the additional groups to the users account.
- Click "Server Management" on the menu and then "Server Groups"
- Click "Edit Users" in the actions column of the server group you would like to modify
-
Click "Add / Edit User Groups" at the top of the table
-
To add a group, enter in the Group name and click "Add Group"
Note
A User Group is only created on the Linux servers once the User Group has been assigned to a User.
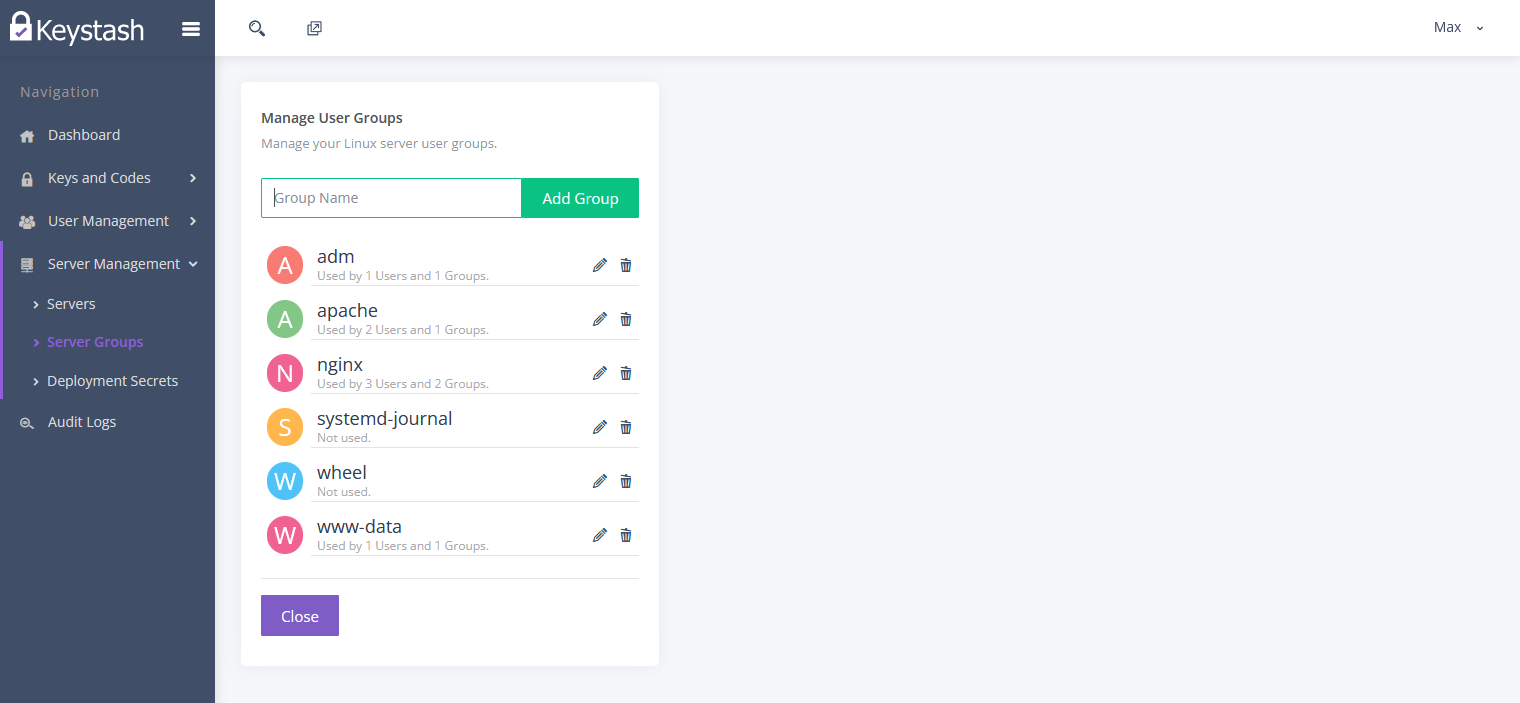
-
You can see which User Groups have users assigned and how many Server Groups are using the respective User Group.
- To edit a group, click the pencil / edit icon to the right of the groups name. Click the disc / save icon to the right of the groups name when you are done
- To delete a group, click the trash / delete icon next to the right of the groups name. Any users assigned to this group will be removed from the group.
Set Default Server Group
You are able to deploy the Keystash agent without specifying a Server Group. When this happens Keystash will assign the new server to the default Server Group. You can always edit the server and adjust which Server Group it belongs too once it has been deployed. To set the default Server Group:
- Click "Server Management" on the menu and then "Server Groups"
-
Click "Set Default" in the actions column of the server group you would to be set as the default Server Group
-
The Server Groups name will change colour to green to indicate it is the default Server Group.
Delete Server Group
- Click "Server Management" and then "Servers"
-
Click on "Delete" in the "Actions" field for the Server Group you want to delete
-
Click "Yes, please!" when prompted
Warning
Any server assigned to this Server Group will no longer be part of this Server Group and it's associated settings and users. Edit the servers in the Server Group first and assign them to a new group.