Getting Started
This guide will take you through the initial setup of Keystash for your organisation. At the end of this you should be able to login to a Linux server configured to use Keystash.
Following these steps, you should have a working system within 10 minutes.
Setup SSH Keys
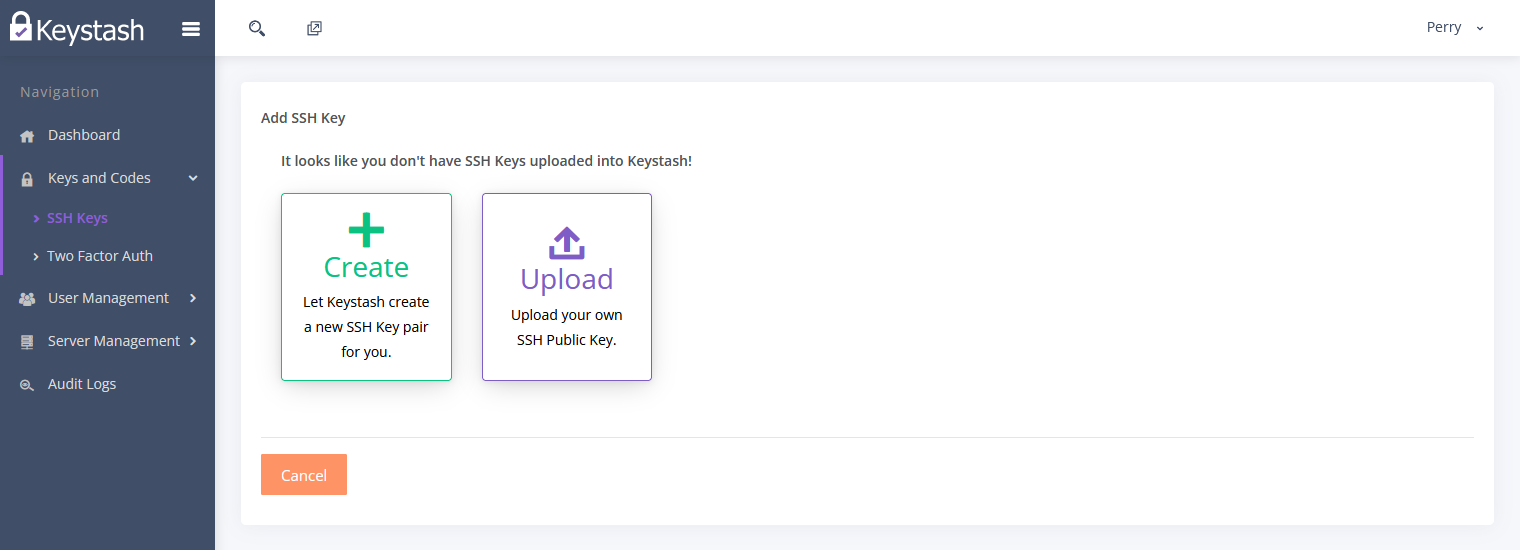
- Create or Upload an SSH Key into Keystash by clicking on "Keys and Codes" on the menu and then "SSH Keys"
-
Click "Create" for Keystash to create a secure SSH Key pair for you or click "Upload" to upload an existing SSH Public Key.
Note
Keystash does not store Private Keys it only stores Public Keys.
-
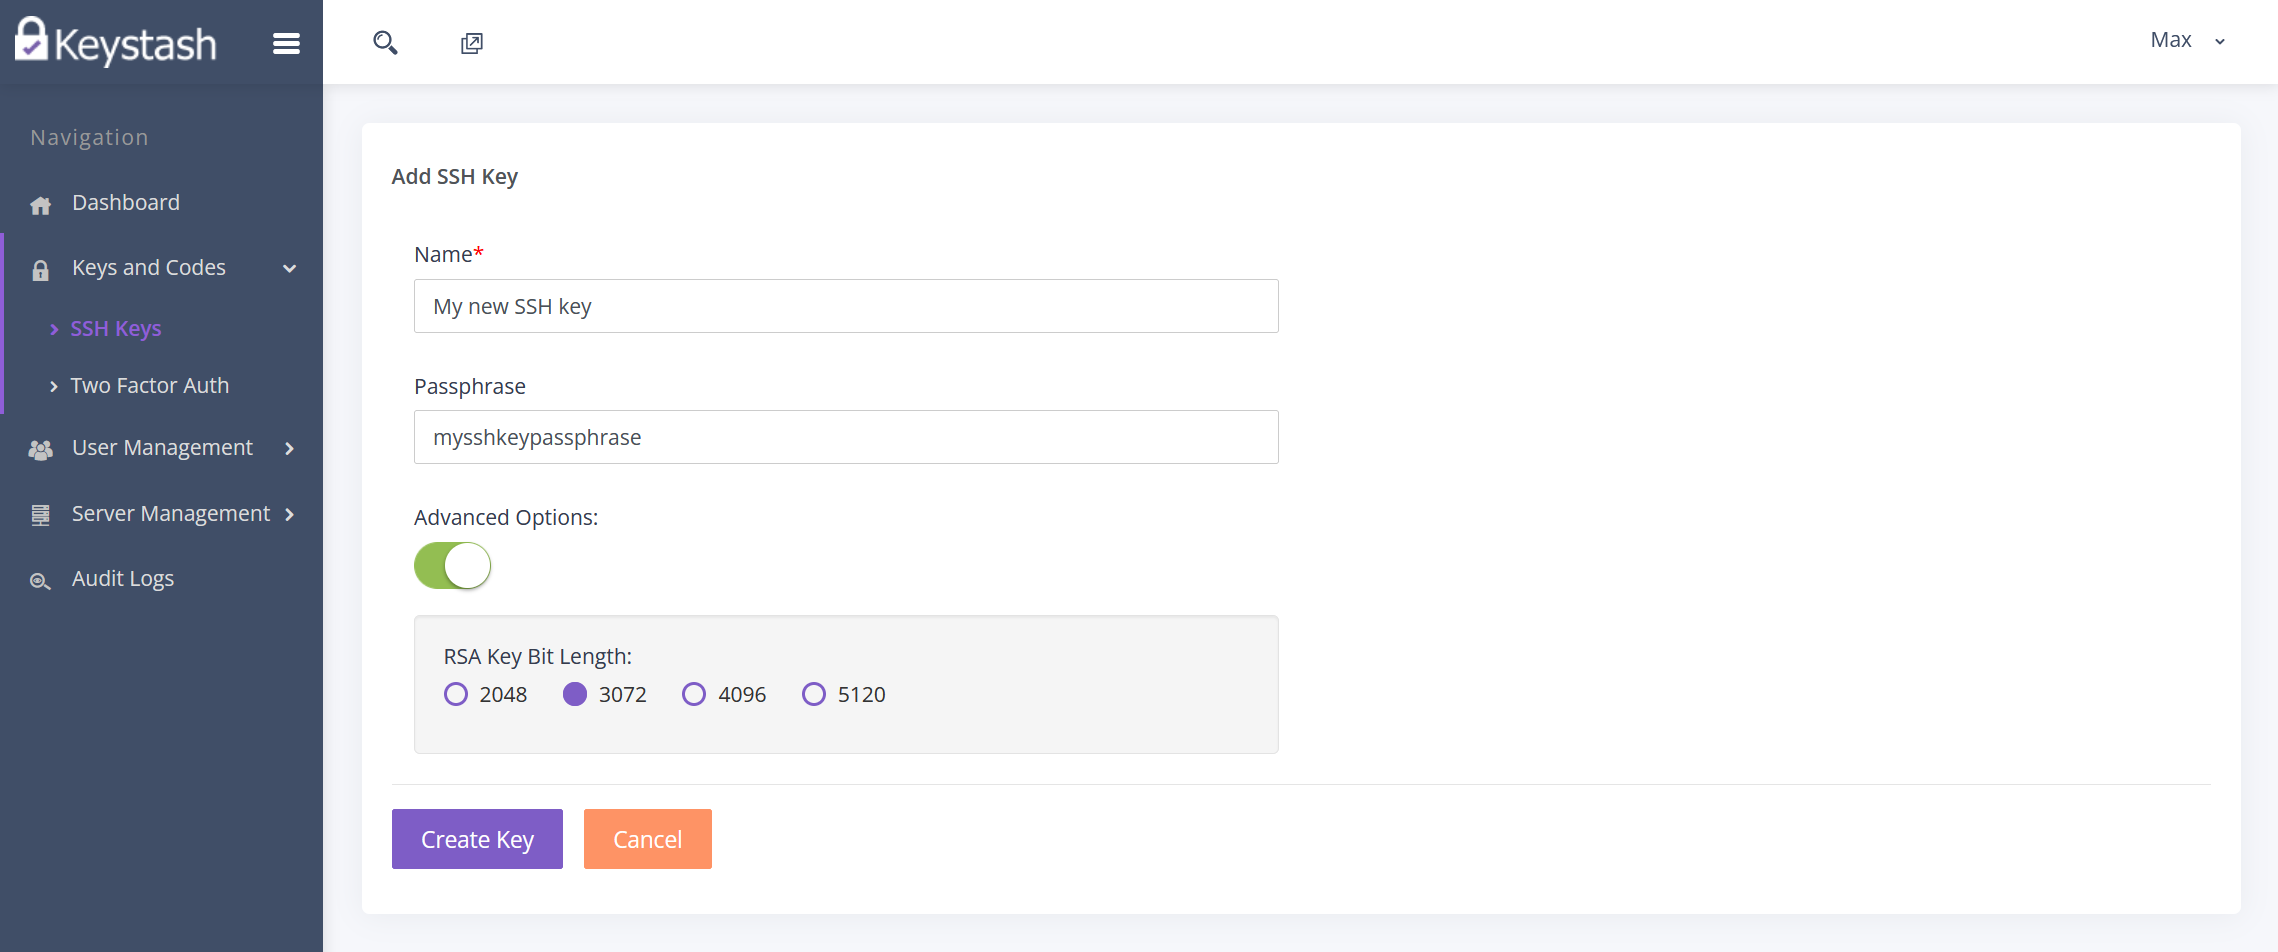
If you select "Create", then you will be provided with the following options:
- Name: This is the friendly name to identify this particular SSH Key.
- Passphrase: For additional security you should always encrypt your Private Key with a passphrase. You will need to enter in this passphrase each time you use your key pair.
-
Advanced Options: In the advanced options you can select the strength of the RSA SSH key pair. Higher numbers dictate a stronger strength and are more secure, however they take longer to create.
-
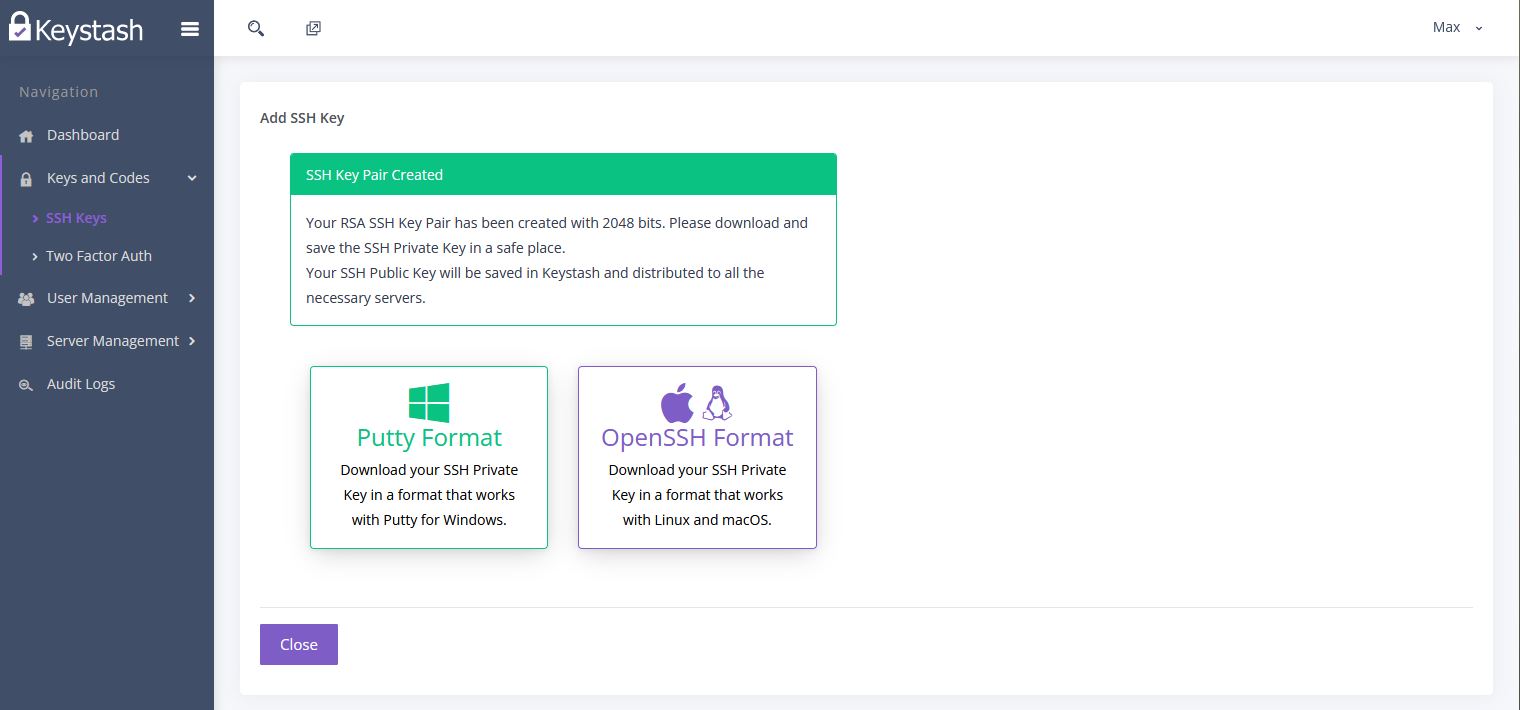
Once you have created the RSA SSH Key Pair you will be given the option to download the Private Key in two different formats.
- Putty Format: This is a format popular with Windows users who make use of the Putty SSH client software.
- OpenSSH Format: This is the format most popular with Linux and MacOS users and will work with most SSH clients.
-
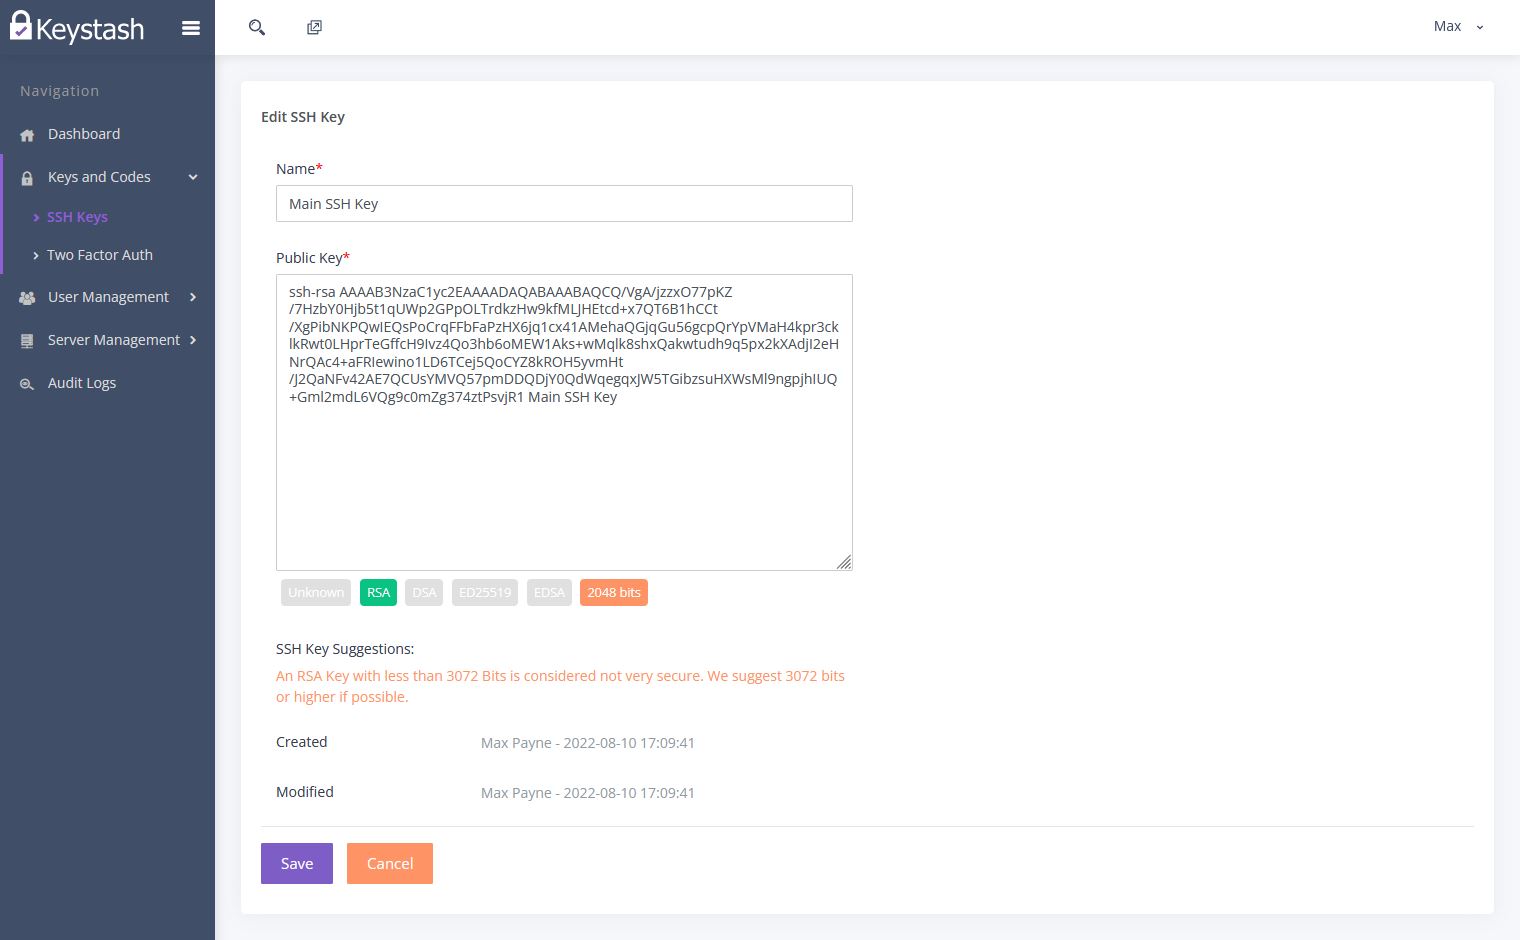
If selected "Upload" then you can provide a friendly name to identify your SSH Key. You will then paste the Public Key into the box provided. Keystash will let you know if it can understand the Public Key once you click out of the box. Please take note of any recommendations that Keystash has for your SSH key.
-
Click "Save" to complete the SSH key upload.
Setup Two Factor Authentication
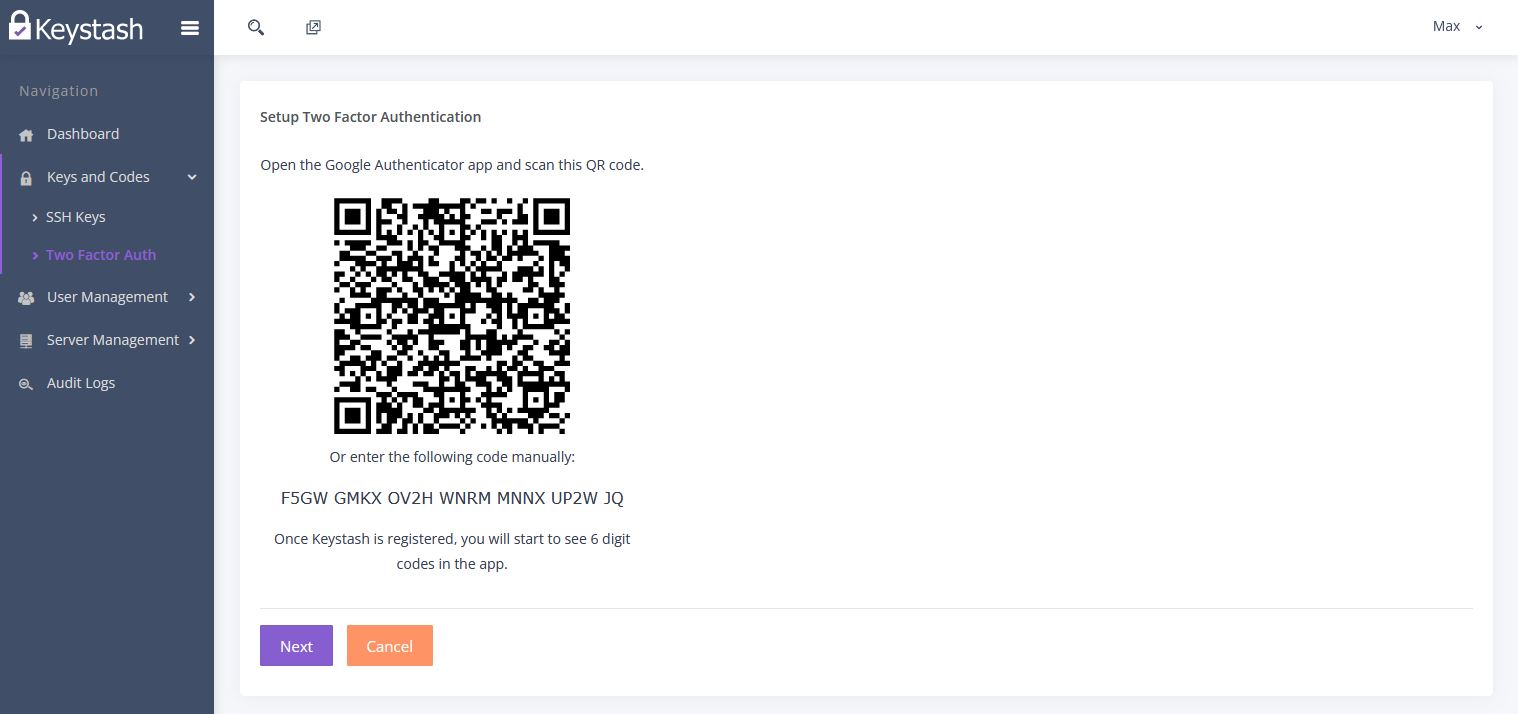
An important part of securing SSH connections is requiring Two Factor Authentication before being allowed to login. Let's setup your mobile Two Factor Authentication App with Keystash:
- Click on "Keys and Codes" on the menu and then "Two Factor Auth"
-
Click on "Create" to start the Two Factor Authentication sign up process. Follow the prompts until complete.
-
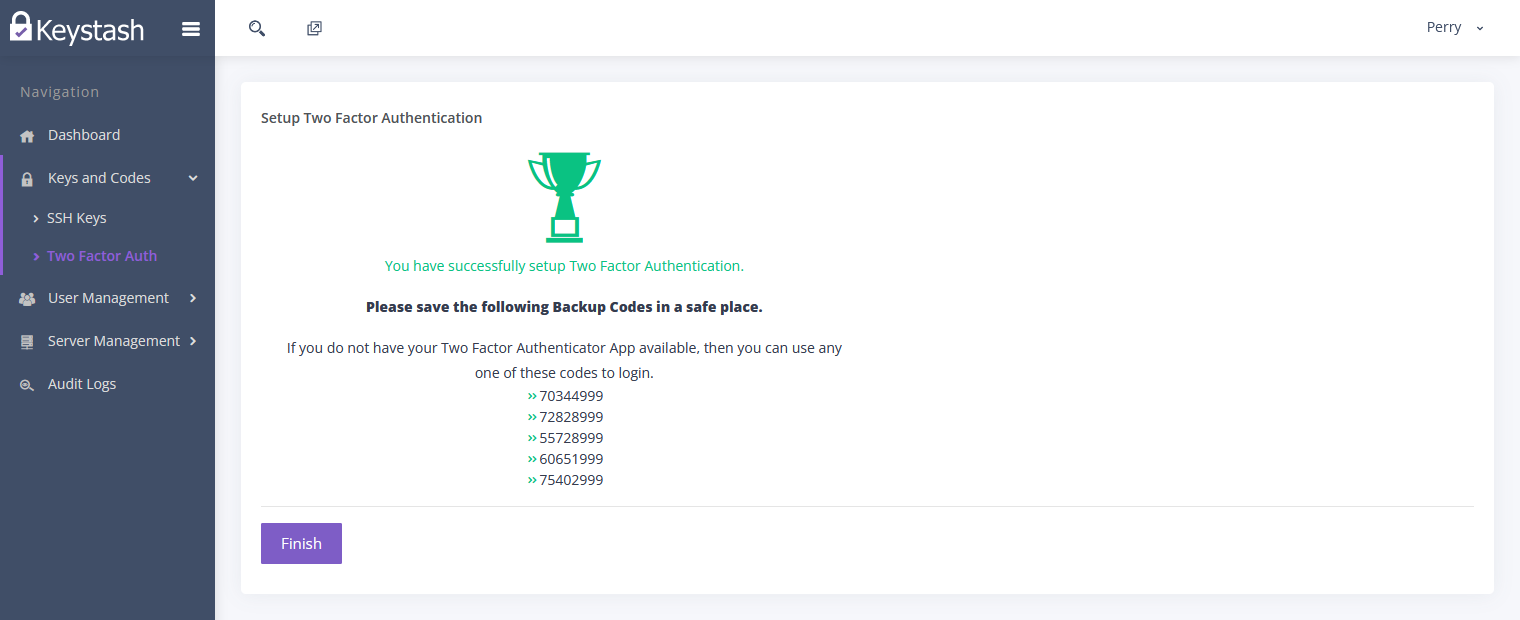
Be sure to save you Backup Codes in a safe place in case you lose your mobile device. These will allow you to login to your Linux servers in an emergency.
-
You can re-setup your mobile device at any time by visiting the "Two Factor Auth" page.
Setup Users
Keystash is big on managing your Linux users. So the next step is to invite your team to use Keystash so that you can start managing them:
- Click "User Management" on the menu and then "Users".
- Click the "Add User" button at the top of the table.
- Simply add an individual user by entering in their details and selecting their role. A role determines the permissions the user has in the Keystash Web Application, not on your Linux servers. You can read more about this in the Role and Permissions section
-
The Server Username field is the username they will use to login to Linux servers.

-
If you would like to create a temporary account for a contractor or short-term user, then simply turn on the "User Account Expires?" setting and choose a date and time to disable or delete the account. You can read more about this here
- When you save the users details they will be sent a welcome email to get on-board Keystash.
Info
If you have a lot of users then consider using the Import Users feature. Here you can upload a CSV file of user details and their respective role assignments in one go.
Setup Server Groups
Server Groups are logical collections of Linux servers that share the same user access and SSH server settings. So for example you might have two Server Groups, one called Production Web Servers and one called Production Database Servers. You would then group your respective servers into each group.
- Start by clicking on "Server Management" on the main menu and then "Server Groups"
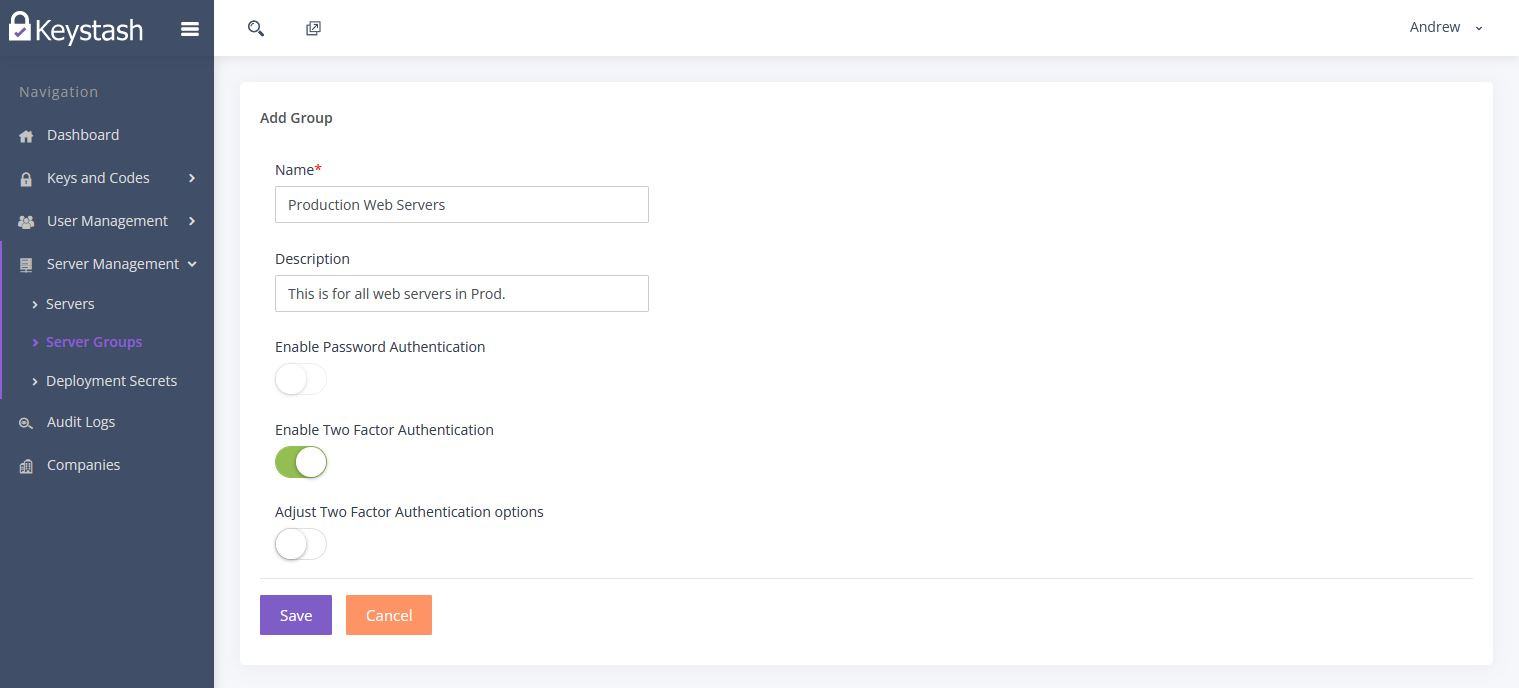
- Either edit an existing group or "Add" a new group.
- The Name and Description fields help you identify this group.
-
We suggest enabling "Two Factor Authentication" to require a Two Factor Authentication token when logging into any of the Linux servers in this Server Group.
Note
This will disable password authentication for all SSH connections to servers in this Server Group. Users will need to use an SSH key and Two Factor Auth 6 digit pin to access the servers.
-
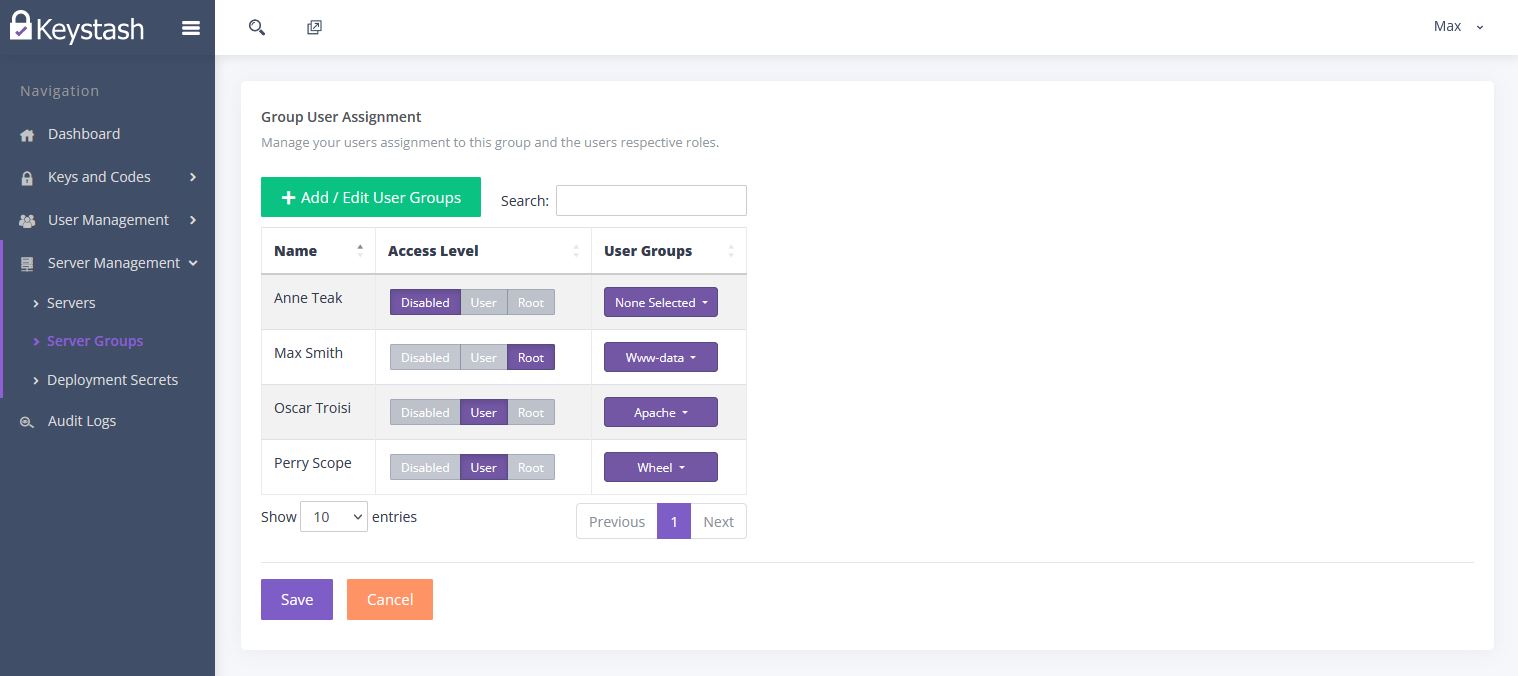
Once you have "Saved" the Server Group, click on "Edit Users" in the list of Server Groups, in the "Actions" column of the group you just created.
-
Assign the appropriate "Access Level" to each user:
- Disabled: The user cannot login to any servers in this Server Group.
- User: The user will have a normal non-privileged account on all servers in this Server Group.
- Root: This user will have "SUDO" root access on all servers in this Server Group.
-
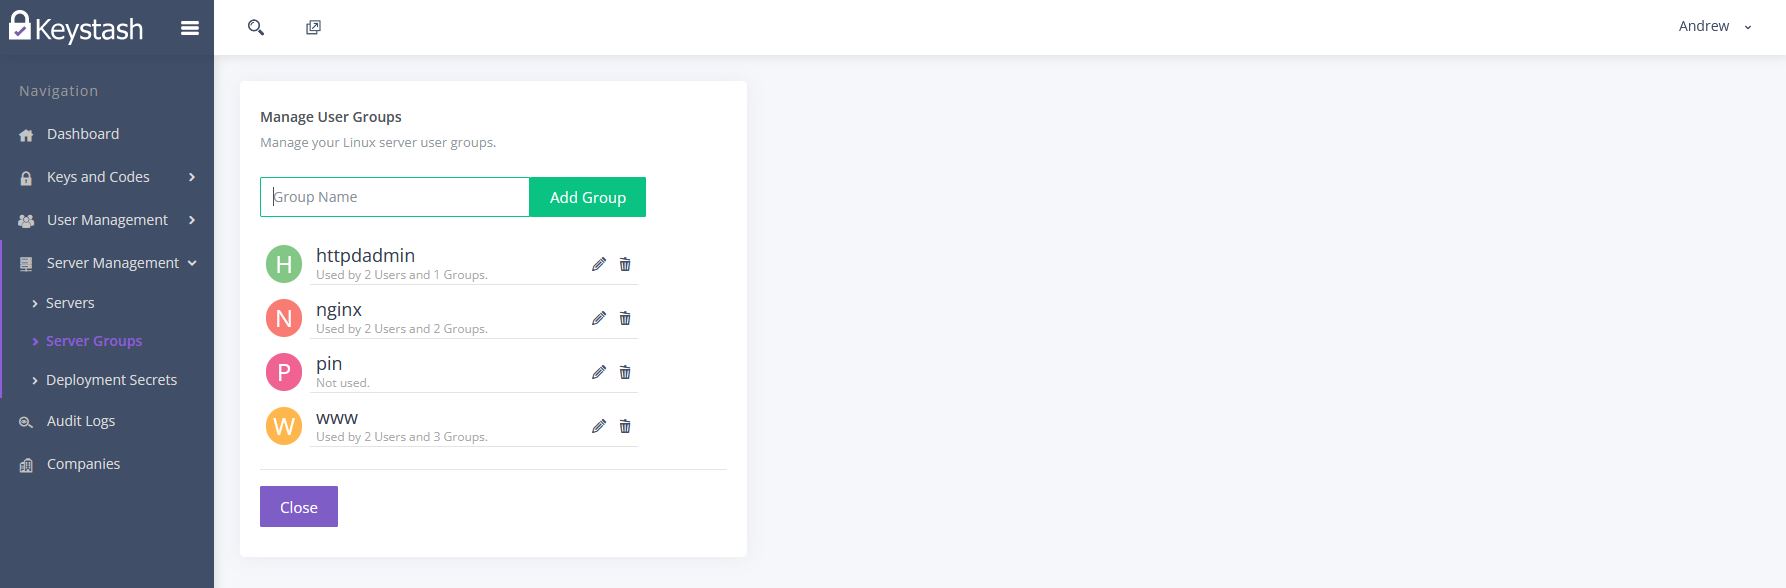
Next you can assign any additional "User Groups" to the user. This is useful if you want the user to be part of any additional Linux user groups, such as nginx etc.
Note
You can create additional User Groups by clicking the "Add / Edit User Groups" button on the top left of the table.
Deploy Keystash to your servers
Keystash requires an agent to be installed on each server. The agent will ensure all the correct users are setup with their SSH Keys and Two Factor Authentication settings. The Keystash agent is easily installed via RPM / YUM and DEB / APT. The agent connects to Keystash via HTTPS & TLS to "server-api.keystash.io" on port 443.
Warning
The Keystash agent will overwrite any user accounts that already exist on the server and in Keystash. The agent will also modify your SSHd and PAM configurations, therefor we strongly recommend you test your deployment on a new blank server first and only then on a live server.
- Start by clicking on "Server Management" on the main menu and then "Servers"
- At this point you won't have any servers in the Servers table.
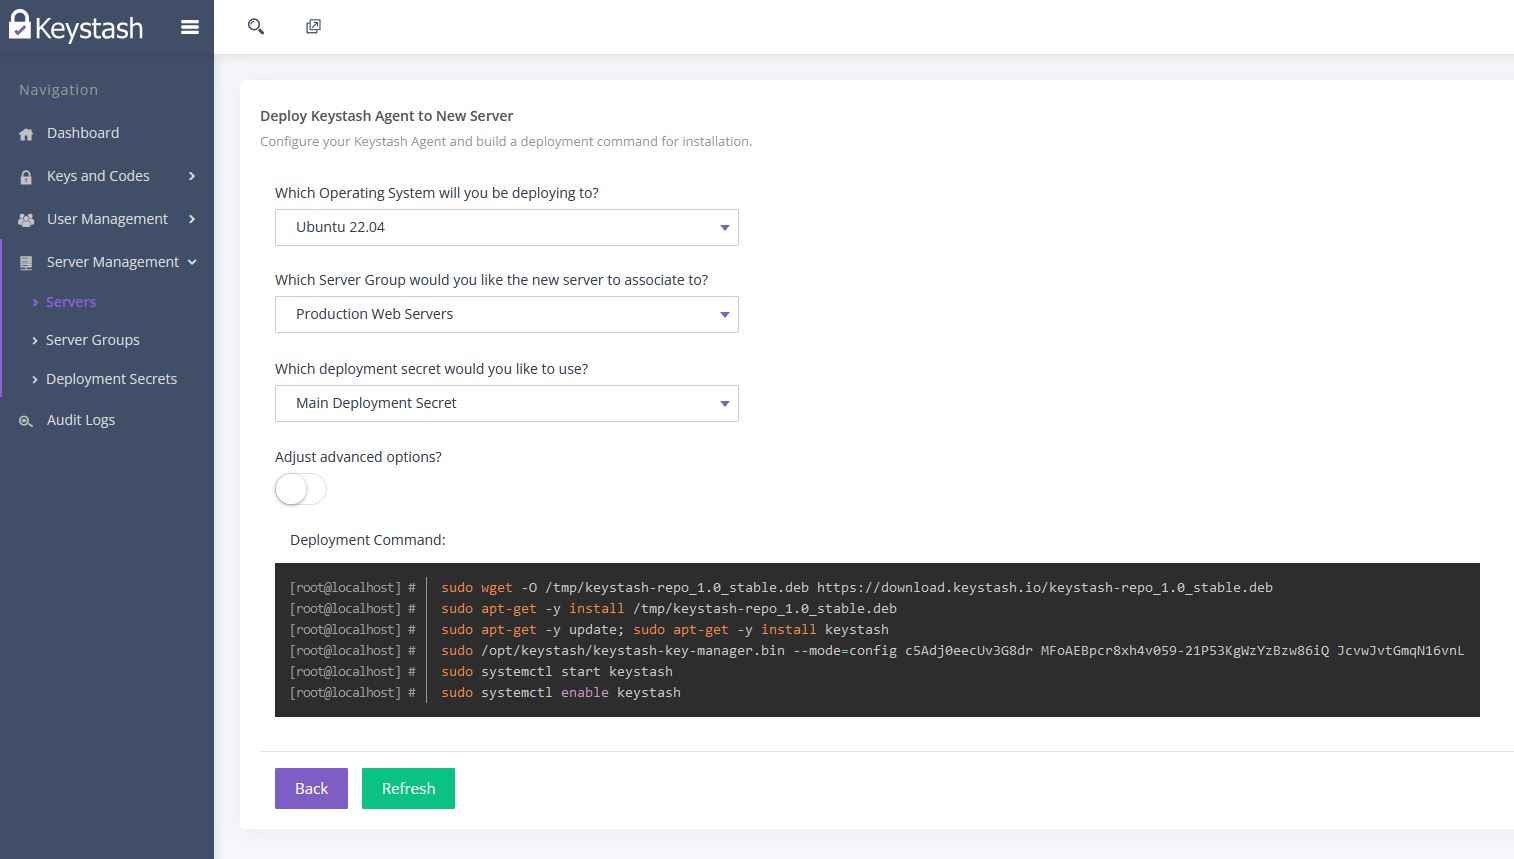
- Click "Deploy to New Server"
- Select the Operating System for the server in question
- Select which Server Group you would like the servers to be associated with
- Select the Deployment Secret you would like the servers to use when connecting to Keystash. You can read more about Deployment Secrets here.
- If you need to utilise a proxy server for outbound connections then click Adjust advanced options? and enter in your proxy details.
-
Copy the Deployment Command and paste this into an existing SSH Terminal window on the server you would like to install on. Alternatively you can use a tool like Ansible or Puppet.
Note
For Debian and Ubuntu servers you should encapsulate the deployment command in brackets "(" & ")". This allows you to paste and run the entire deployment command in one go.
-
Once the installation is complete you can then click "Back" to return to the Servers list. Your server will then show up in the list within a minute. The server should show up with a "Connected" status to indicate that everything is working correctly. You can read more detail on deploying the agent here.
Note
The Keystash agent will periodically synchronise all users and settings with Keystash. The period is determined by the plan your organisation is on. The periods are defined as follows:
| Plan | Refresh Period |
|---|---|
| Free | 5 Min |
| Essentials | 90 Sec |
| Pro | 60 Sec |
| Business | 60 Sec |
Your system is now ready for you to explore and use in more depth. You should invite more team members and add more servers to get the maximum benefit from Keystash.